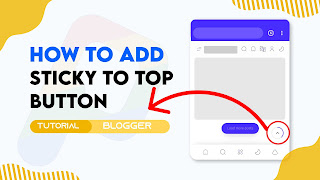
If you are looking for how to add a Sticky To Top Button With Scroll Progress On Blogger website then this post is just for you.
I am Monish. I have been involved with coding for a long time. I will give you proper advice from long experience so let's start.

We only used then HTML, CSS and JS. Are you upset about your website speed? do not worry it doesn't affect your website speed.
Also do not worry about it this Accordion Section also has dark mode CSS that you just want to change the dark mode class that we gave with your theme dark mode class, you can fluently change it by following this tutorial precisely.
Should you add a Reading progress bar?
As I would see it, I will tell yes you need to add a perusing progress bar in your Blogger site on the grounds that your site guests will consider this like a difficult model: to peruse the article totally and the advancement bar will assist with perusing the article totally for guests and your site impressions increments.
How progress bar works?
At the point when the site guests visits the site that adds a perusing progress bar they can see a line going front when looks down and returning when looks up it works with involving a few codes in your Blogger site.
So without wasting important time let's check How To Add Responsive Sticky To Top Button With Scroll Progress ?
You can see the demo here:-
How To Add Responsive Sticky To Top Button With Scroll Progress ?
Important!Before we start adding codes in XML, I will recommend you to take a Backup of your current theme. By chance if any problem occurs, you can restore it later.
Step 1: First of all Login to your Blogger Dashboard.
Step 2: On Blogger Dashboard, click Theme.
Step 3: Click the arrow down icon next to 'customize' button.
Step 4: Click Edit HTML, you will be redirected to editing page.
Step 5: Now search the code ]]></b:skin> or /*]]>*/</style> and paste the following CSS Codes just above to it. Or you can paste it above <head/> tag by adding <style></style>
/* Reading Progress Bar by The Pro Project */
  .tTpB{justify-content:center;position:fixed;right:20px;width:45px;height:45px;border-radius:50%;cursor:pointer;visibility:hidden;opacity:0;z-index:9999;transform:scale(0);transition:transform .3s ease,opacity .3s ease,visibility .3s ease,margin-bottom 1s ease}.tTpB.vbl{visibility:visible;opacity:1;transform:scale(1)}.tTpB{bottom:70px}.tTpB:hover{opacity:.8}.tTpB svg{height:100%;width:100%;-webkit-transform:rotate(-90deg);-ms-transform:rotate(-90deg);transform:rotate(-90deg);stroke-width:1.5;cursor:pointer}.tTpB svg .b{fill:#fff;stroke:#e6e6e6;opacity:.9}.tTpB svg .c{fill:none;stroke:#482dff;stroke-dasharray:100 100;stroke-dashoffset:100;stroke-linecap:round}.tTpB svg .d{fill:none;stroke:#08102b}.drK .tTpB svg .b{fill:#2d2d30;stroke:#404045}.drK .tTpB svg .c{stroke:#8775f5}.drK .tTpB svg .d{stroke:#fffdfc}.tTpB{display:flex;align-items:center}
Don't forget to change .drK with your website theme dark mode class, if your theme did not have a dark mode feature then keep default!
Step 6: Then find the code </body> and paste the following CSS Codes just above to it.
<div class="tTpB" id="backTop" onclick="window.scrollTo({top: 0});">
  <svg viewBox="0 0 34 34">
    <circle class="b" cx="17" cy="17" r="15.92"></circle>
    <circle class="c scrollProgress" cx="17" cy="17" r="15.92"></circle>
    <path class="line d" d="M15.07,21.06,19.16,17l-4.09-4.06"></path>
  </svg>
</div>

<script type="text/javascript">
   //<![CDATA[
  	var progressPath = document.querySelector(".scrollProgress");
  	var pathLength = progressPath.getTotalLength();

  	progressPath.style.transition = progressPath.style.WebkitTransition = 'none';
  	progressPath.style.strokeDasharray = pathLength + ' ' + pathLength;
  	progressPath.style.strokeDashoffset = pathLength;
  	progressPath.getBoundingClientRect();
  	progressPath.style.transition = progressPath.style.WebkitTransition = 'stroke-dashoffset 10ms linear';

  	var updateProgress = function() {
  		var scroll = document.documentElement.scrollTop;
  		var height = document.documentElement.scrollHeight - window.innerHeight;
  		var progress = pathLength - (scroll * pathLength / height);
  		progressPath.style.strokeDashoffset = progress;
  	}

  	updateProgress();
  	window.addEventListener('scroll', (updateProgress));

  	var offset = 0;
  	var duration = 550;

  	window.onscroll = function() {
  		 if (document.documentElement.scrollTop > offset) {
  			document.querySelector('.tTpB').classList.add('vbl');
  		} else {
  			document.querySelector('.tTpB').classList.remove('vbl');
  		}
  	};

  	document.querySelector('.tTpB').onclick = function() {
  		document.querySelector('html, body').animate(window.scroll({
             top: ['8px', '280px']
                },{ duration: 2500,        // number in ms [this would be equiv of your speed].
                    easing: 'ease-in-out',
                    iterations: 1,         // infinity or a number.
                 // fill: ''
       }));
  		return false;
  	};
  //]]>
</script>
Step 7: Save or Publish the html changes by clicking on this icon
Terms of Use
To appreciate our workshop, consider keeping the credits in canons.
We do not allow to rewrite this post in any manner. Do not copy this post, canons or any part from this composition without authorization, it's rigorously prohibited.However, Legal conduct will be taken, If you do so.
Conclusion
In this article I have made a tutorial on How To Add Responsive Sticky To Top Button With Scroll Progress. I Hope you have liked this article and please do share with your friends and follow up blog for more.
Our All Posts Are Protected By DMCA. So Don't Try To Copy Our Posts And Reproduction In Any Way Is Strictly Prohibited! Or else Legal Actions Will Be Taken. © The Pro Project | All Rights Reserved
© Copyright:
www.the-pro-project.blogspot.com